Tuesday, June 29, 2021

Batch Printing Emails From Microsoft Outlook with MessageExport Add-in

MessageExport by Encryptomatic LLC is an Windows Office add-in for Microsoft Outlook. It extends Outlook's email exporting capabilities, allowing you to process emails to PDF and other image formats. MessageExport can also be used to batch print emails.  

To use the batch printing capability, you will select "Printer" from the drop down list.  Then, select multiple emails in Outlook's mail list, and click or tap the "Export" button.

MessageExport add-in displayed in MS Outlook toolbar. "Printer" export profile is selected.

You can have multiple "Printer" export profiles in MessageExport, making it quick and easy to send the email print job to any printer you choose.

By selecting the "Printer" profile and then the tools icon from the toolbar, you can edit the Printer profile and then save it as a new profile.  For example, Printer could be renamed "Printer-Canon", so you know that printing emails to the "Printer-Canon" profile will always send the print job to the Canon printer.

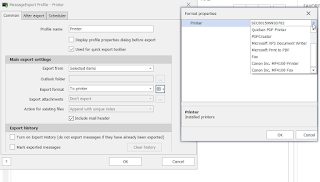
MessageExport, printer selection screen is shown.

MessageExport add-in for Outlook works with Outlook versions 365/2019/2016/2013/2010. If your job requires you to regularly work with email messages, you will quickly come to appreciate all the time that MessageExport can save you.

Processing emails for printing is only one capability of MessageExport. See for yourself how much it can do for you by getting the free trial.

Try it free for 15 days.


Monday, September 28, 2020

Introducing Encryptomatic OpenPGP Windows Desktop Encryption


Thanks to the support we have received from users of Encryptomatic OpenPGP add-in for Microsoft Outlook, we have been encouraged to expand its capabilities.  In the latest release, Encryptomatic OpenPGP now includes Windows desktop functionality and integration with the Windows right click context menu.

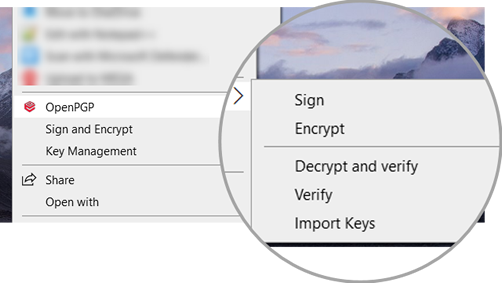
Screen shot showing OpenPGP integrated with Windows desktop right click context menu. Capabilities incude Sign and Encrypt, and Key Management..

By downloading and running the signed installer package, Encryptomatic OpenPGP will integrate with Windows desktop and Microsoft Outlook (if available), then launch a wizard that will guide new users through the process of creating a key pair.


For information on downloading and installing Encryptomatic OpenPGP, visit the product homepage.


Tuesday, August 18, 2020

Creating Custom Email Export Profiles with MessageExport

MessageExport add-in for Microsoft Outlook brings new features to the Outlook toolbar interface, making it easy to save emails in different formats, and in different ways.   Although MessageExport is highly functional right out of the box, sometimes you may find that you have an 'edge case' for exporting emails that requires a custom profile.

To be clear, export profiles are stored sets of instructions that cause MessageExport to perform specific tasks, like exporting a message to PDF, giving the PDF file a specific name, and then copying it some where on your hard drive.  You select the active export profile by choosing from the MessageExport drop down toolbar.


Outlook export profiles in MessageExport

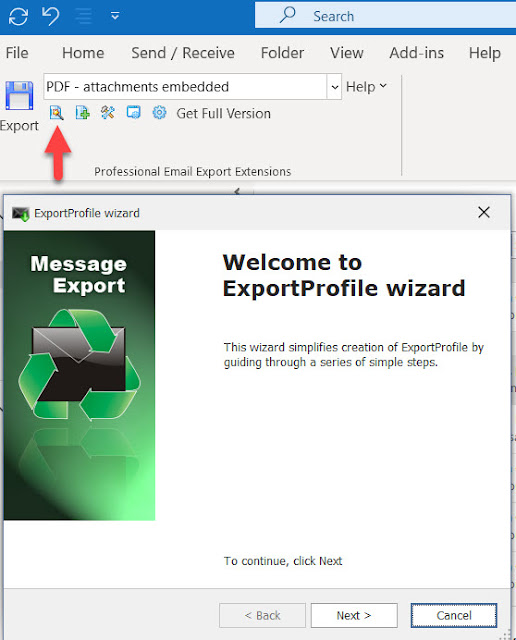
 In this article, we will show you how to invoke the MessageExport profile wizard so you can build our own custom profile.  To invoke the wizard, click the wizard button in the MessageExport toolbar. The location of the wizard button is shown in the below image.

Profile wizard button location

Click "Next" to continue progressing through the wizard. The next screen lets you select the conversion format.  For example, if you want to export Outlook emails to Tiff image format, then choose TIFF from the drop down list.

Click Next to go to the next screen.  


Naming Schema Settings is where you choose the email data that is used to provide a name to exported emails.  The currently selected fields appear on the right.  Using the arrow buttons, you can remove fields you don't want, and add fields that you do want.  You can also add "constructors" to the name, which are characters like hyphen or underscore which help make the file name more readable.

Click next again to go to the Output Folder screen.

During an export operation, you may want to choose where MessageExport saves the converted emails.  The wizard lets you store a pre-defined Windows folder in the export profile.  You can also choose to be prompted for a location at the start of the export operation.

Click next to advance the wizard. 

Congratulations! You have completed making your first MessageExport profile. Click finish and your new profile will now appear in the main MessageExport drop down list.

You can always edit the profile (or any profile) by choosing the profile in the list and then clicking the Edit button in the MessageExport toolbar.

If you have any questions about creating MessageExport email export profiles, post them below or contact the Encryptomatic LLC support team.