The title of this post says it all. Sometimes when we are reviewing our server logs, we get a glimpse into exactly what people are searching for when they arrive at this blog. This particular person (we don't know who you, only what you searched for in Google) is trying to accomplish a very specific task; "how to copy an entire Outlook folder to a location on their Windows desktop while simultaneously converting the emails to EML format."
MessageExport add-in for Microsoft Outlook by Encryptomatic LLC was built specifically for people like this. Here is a step by step guide for using the MessageExport add-in for Outlook to accomplish this.
First, you must be running Microsoft Outlook (2010, 2013, 2016, or 365) and have MessageExport installed. You can download a free trial from the MessageExport home page.
MessageExport is tightly integrated with Outlook, and installs as an add-in. The MessageExport toolbar will appear in Outlook.
A drop down list on the toolbar shows the wide variety of target formats that can be selected. You can also export and convert entire Outlook folders, or individual messages. The selections from the drop down list, which are titled in the manner of "Export to PDF" and "Export to EML," are known as Export Profiles. These are sets of instructions that tell MessageExport what you want to accomplish.
MessageExport ships with with many basic export profiles, but sadly there is not a specific profile that would move an entire Outlook folder to the Windows desktop while converting the messages into EML format. That might be the end of this article if the developers had not included the ability for you to create your own custom profiles, which is what we will do right now.
To create our own Export Profile, first click the "Options" button from the toolbar.
This will open the MessageExport options window. There are many things we can do from this window, but for now, just click "New Profile" to start the process of setting up our custom profile.
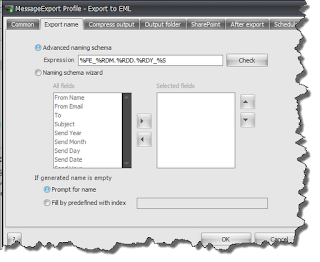
The profile editor opens, and we can now instruct MessageExport as to what it should do when we call this profile from the toolbar.
MessageExport add-in for Microsoft Outlook by Encryptomatic LLC was built specifically for people like this. Here is a step by step guide for using the MessageExport add-in for Outlook to accomplish this.
First, you must be running Microsoft Outlook (2010, 2013, 2016, or 365) and have MessageExport installed. You can download a free trial from the MessageExport home page.
MessageExport is tightly integrated with Outlook, and installs as an add-in. The MessageExport toolbar will appear in Outlook.
 |
| MessageExport toolbar shown in MS Outlook 2010 |
To create our own Export Profile, first click the "Options" button from the toolbar.
 |
| Options button in the MessageExport toolbar |
 |
| Click New Profile |
First, in the "Profile Name" field, enter "Export Folder to EML." This is the name that will appear in the drop down list. We can name it anything we want so long as it makes sense to us.
Next, in the "Export From" field, choose "Selected folders with subfolders." This setting will allow us to choose our folder in Outlook by clicking on it. Other options for this field include "selected items," "incoming email," and others. Make a mental note of these options, because you may want to come back later and create other profiles that behave differently.
To tell MessageExport that we want to convert the messages in the folder to EML format, select "EML" from the "Export format" field.
Notice the "Outlook folder" field. If we always want to export email from the same folder, then you can use this field to select that folder. For now, lets leave that field blank so MessageExport will work on the folder we select in Outlook.
Also notice the "Turn on Export History" option. Check this button if you want MessageExport to remember which emails it has already exported with this profile. Doing so will prevent exporting messages that have already been exported.
Also also notice the tab along the top of this window called "Output Folder." Use this if you always want MessageExport to save your EML files to the same folder or network location. For now, lets leave "Output Folder" untouched so that MessageExport will ask us for a target folder.
Click Ok. The "Export Folder to EML" option will now appear in our MessageExport drop down list and is ready to use.
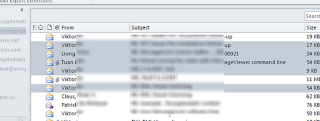
First, click on the Outlook folder that you want to export. In my example, I will export my "Sent Items" folder.
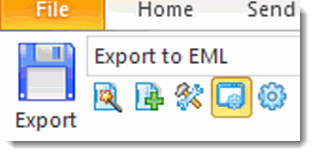
Next, select our new "Export Folder to EML" profile from MessageExport's drop down list, then click the "Export" button to begin the process.
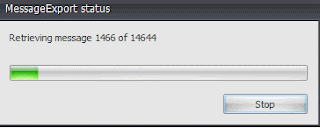
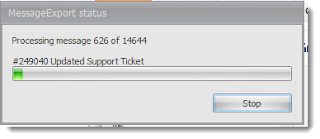
MessageExport will begin processing messages, and will then ask you for the target location where it should save your EML files.
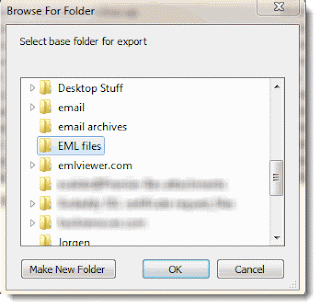
If you want to save your EML files to a folder on your Windows desktop, as the visitor to our website wanted to do, then simply select a folder in that location when MessageExport "Browse for Folder" dialog box appears.
And that's it! If you have any questions or comments, please add them below.
We are here if you need us. Feel free to email us at supportline at encryptomatic dot com, or call us: 1-651-851-4902 x2. Thank you for reading.
[Updated 2019]
 |
| Export Profile Editor |
Notice the "Outlook folder" field. If we always want to export email from the same folder, then you can use this field to select that folder. For now, lets leave that field blank so MessageExport will work on the folder we select in Outlook.
Also notice the "Turn on Export History" option. Check this button if you want MessageExport to remember which emails it has already exported with this profile. Doing so will prevent exporting messages that have already been exported.
Also also notice the tab along the top of this window called "Output Folder." Use this if you always want MessageExport to save your EML files to the same folder or network location. For now, lets leave "Output Folder" untouched so that MessageExport will ask us for a target folder.
Click Ok. The "Export Folder to EML" option will now appear in our MessageExport drop down list and is ready to use.
Using Our New Export Profile to Convert Email in an Outlook Folder to EML Files
Now that we have create our new export profile, lets put it to work. There are only a few simple steps we need to perform.First, click on the Outlook folder that you want to export. In my example, I will export my "Sent Items" folder.
 |
| Outlook 2010 folder list |
Next, select our new "Export Folder to EML" profile from MessageExport's drop down list, then click the "Export" button to begin the process.
 |
| MessageExport toolbar |
MessageExport will begin processing messages, and will then ask you for the target location where it should save your EML files.
 |
| Select a target folder |
If you want to save your EML files to a folder on your Windows desktop, as the visitor to our website wanted to do, then simply select a folder in that location when MessageExport "Browse for Folder" dialog box appears.
And that's it! If you have any questions or comments, please add them below.
We are here if you need us. Feel free to email us at supportline at encryptomatic dot com, or call us: 1-651-851-4902 x2. Thank you for reading.
[Updated 2019]


