MessageExport is an add-in for Microsoft Outlook (2010/2013/2016/365) that extends Outlook's ability to manipulate email. Among MessageExport's many capabilities is the automation of Outlook email to PDF. You can use MessageExport to automatically convert Outlook email into PDF files, with options to convert email file attachments into PDF as well.
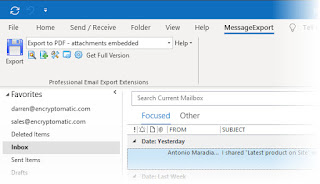
The basic method of using MessageExport is to select the emails you want to convert in the Outlook mail list, choose the export profile (that's the target format selected from the drop down list, such as pdf, msg, csv, etc), and then click the "Export" button.
MessageExport's "Export Profiles" give you a lot of control over how they function. You can create your own export profiles or edit the existing profiles. Let's talk about how we can set MessageExport to automatically export email messages to PDF.
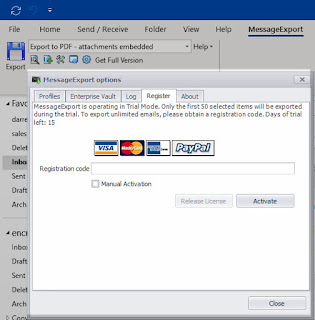
Once MessageExport is installed on your computer (a free 15 day trial is available for testing), consider how you want message to flow. For example, do you want to export only certain messages to PDF format? If so, you should begin with an Outlook rule that will place a copy of specific messages into an Outlook folder. MessageExport can then be setup to monitor that folder and export any emails that are copied to that folder into PDF files.
Next, ask yourself how you want to handle email file attachments. Should MessageExport ignore attachments? Embed them as separate files within the PDF? Should it extract the files to disk? Or should it try to convert the file attachments into the PDF document image?
Once you've come to a decision on the above items, let's proceed.
In our example today, I am going to have MessageExport convert all email messages that are copied to a specific folder into PDF files.
First, right click on your Outlook folder structure and select "new folder."
Next, setup an Outlook rule that will copy email that meet your specific criteria to this new folder.
Third, go the MessageExport settings and edit the Export Profile to process new email messages that arrive in this folder. Here's how to accomplish step three in detail.
First, go to the MessageExport toolbar and select the profile called "Export to PDF - attachmetns converted/included." Then click the Edit Profile button.
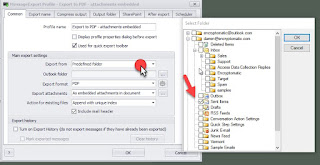
Click Edit Profile will cause the profile settings window to appear. Next, change the "Export From" field to "Predefined Folder with Subfolders." This will cause a folder window to popup. Select the Outlook folder where your Outlook rule will be copying emails. This folder will contain the emails that MessageExport will process.
To have MesageExport only save new email messages, check the box that says, "Turn on Export History." Now it will only export an email one time and prevent duplicates.
From here, click the tab called "Scheduler" to setup the intervals at which MessageExport will check the folder and process any new emails. Click "Enabled" to turn on the scheduler.
You can then set the time for the first execution of the schedule, as well as an optional last date. The schedule can be set to repeat at any interval you wish. Intervals are scheduled in minutes. To repeat every hour, just type in 60 minutes.
Click Ok, and you're ready to go! MessageExport will run this schedule at the interval you specify, will convert any new email messages to PDF that your rule places in the target folder, and will copy those PDF files to a location that you specify.
Thanks for reading, and if you have any questions please ask them in the comments field below.
The basic method of using MessageExport is to select the emails you want to convert in the Outlook mail list, choose the export profile (that's the target format selected from the drop down list, such as pdf, msg, csv, etc), and then click the "Export" button.
 |
| MessageExport Toolbar in Outlook 2010 |
MessageExport's "Export Profiles" give you a lot of control over how they function. You can create your own export profiles or edit the existing profiles. Let's talk about how we can set MessageExport to automatically export email messages to PDF.
Once MessageExport is installed on your computer (a free 15 day trial is available for testing), consider how you want message to flow. For example, do you want to export only certain messages to PDF format? If so, you should begin with an Outlook rule that will place a copy of specific messages into an Outlook folder. MessageExport can then be setup to monitor that folder and export any emails that are copied to that folder into PDF files.
Next, ask yourself how you want to handle email file attachments. Should MessageExport ignore attachments? Embed them as separate files within the PDF? Should it extract the files to disk? Or should it try to convert the file attachments into the PDF document image?
Once you've come to a decision on the above items, let's proceed.
In our example today, I am going to have MessageExport convert all email messages that are copied to a specific folder into PDF files.
First, right click on your Outlook folder structure and select "new folder."
Next, setup an Outlook rule that will copy email that meet your specific criteria to this new folder.
Third, go the MessageExport settings and edit the Export Profile to process new email messages that arrive in this folder. Here's how to accomplish step three in detail.
First, go to the MessageExport toolbar and select the profile called "Export to PDF - attachmetns converted/included." Then click the Edit Profile button.
Click Edit Profile will cause the profile settings window to appear. Next, change the "Export From" field to "Predefined Folder with Subfolders." This will cause a folder window to popup. Select the Outlook folder where your Outlook rule will be copying emails. This folder will contain the emails that MessageExport will process.
To have MesageExport only save new email messages, check the box that says, "Turn on Export History." Now it will only export an email one time and prevent duplicates.
From here, click the tab called "Scheduler" to setup the intervals at which MessageExport will check the folder and process any new emails. Click "Enabled" to turn on the scheduler.
You can then set the time for the first execution of the schedule, as well as an optional last date. The schedule can be set to repeat at any interval you wish. Intervals are scheduled in minutes. To repeat every hour, just type in 60 minutes.
 |
| MessageExport's Outlook Scheduler |
Thanks for reading, and if you have any questions please ask them in the comments field below.


